
Table of Contents
How To Screenshot on Windows and Master the Screenshot Techniques
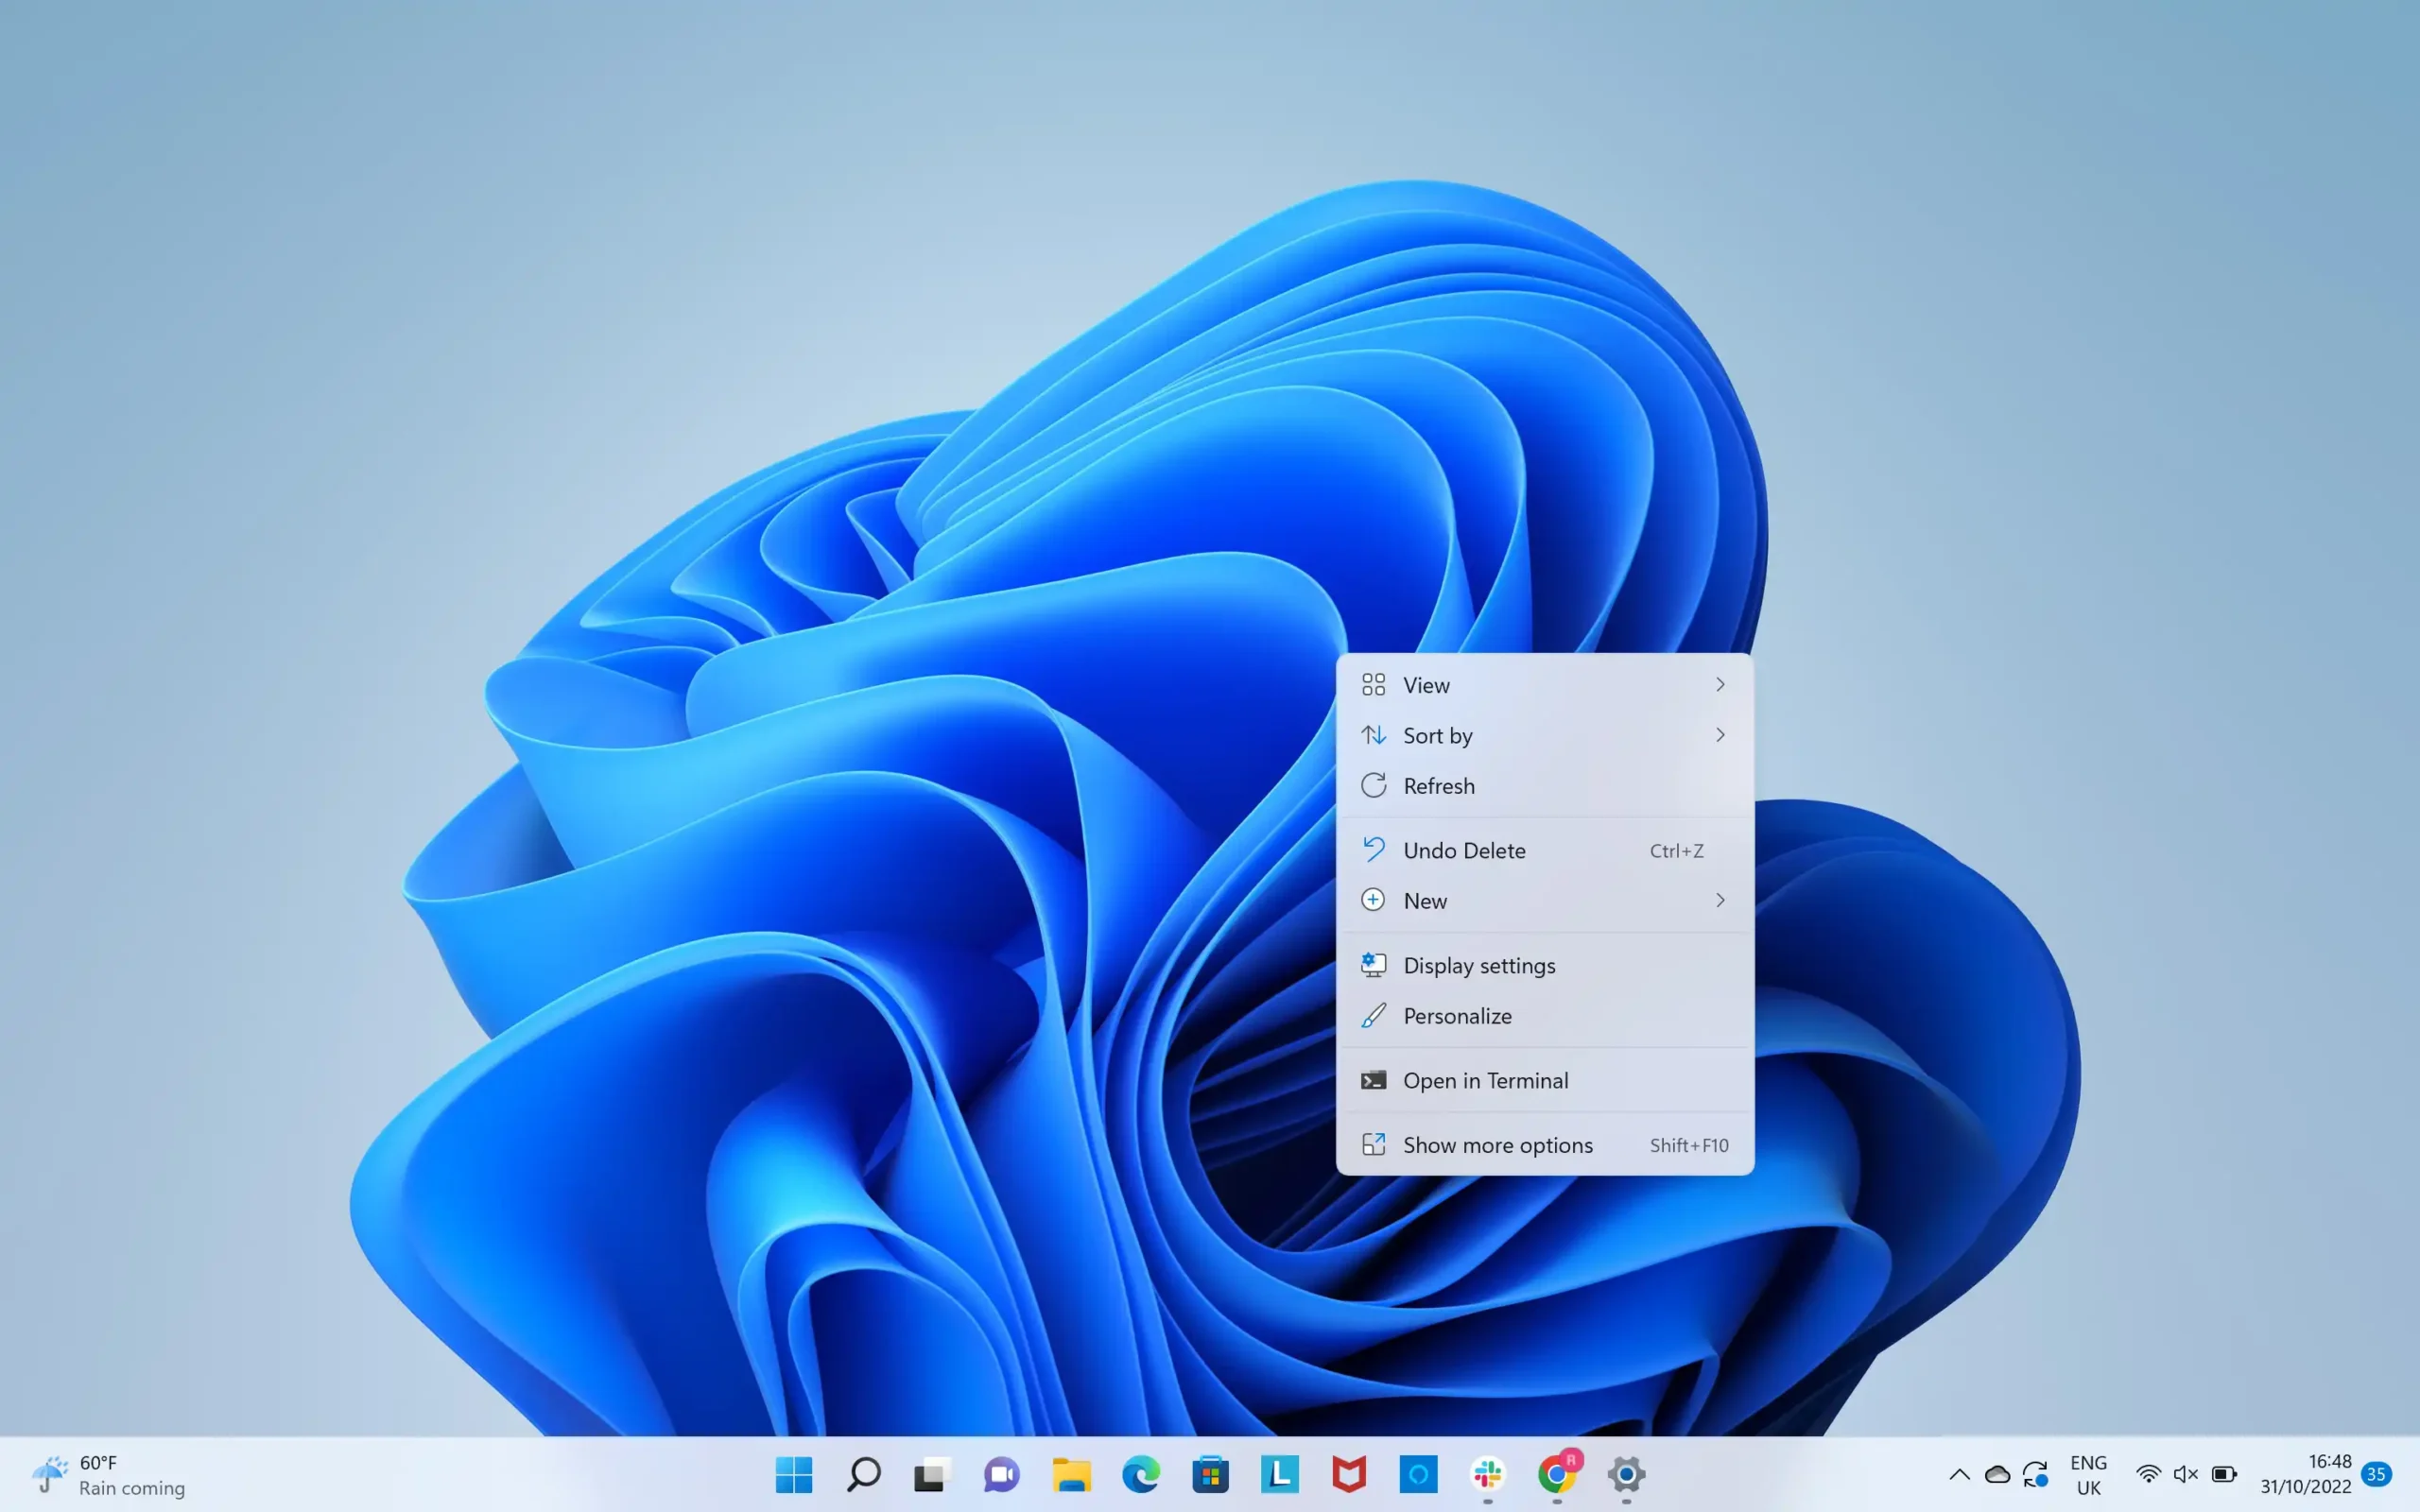
Let’s get to know the way tp master the art of “How to screenshot on windows”, Capturing a snapshot of your computer screen – a screenshot – can be incredibly useful. Whether you want to share a funny meme, document a specific error message, or simply save an important piece of information, screenshots come in handy all the time. In the world of Windows 10, taking screenshots is a breeze! Let’s explore three fantastic methods that cater to different needs.
Method 1: How To Screenshot With The Classic Print Screen Key
This method is the OG of screenshot techniques, and for good reason. It’s straightforward and perfect for capturing your entire screen in a flash. Here’s how it works:
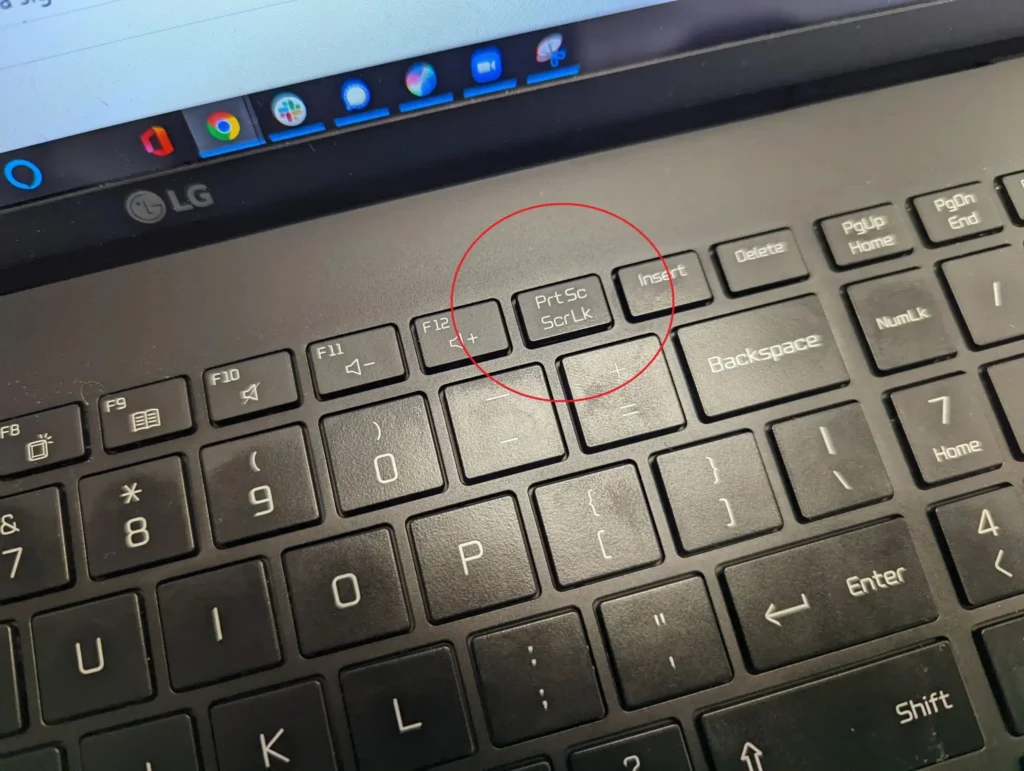
- Locate the Print Screen Key: Take a peek at your keyboard. You’ll find a key typically labeled “PrtSc” or “PrtScn” – that’s your hero!
- Capture the Whole Screen: Simply press this magic key once, and voila! Your entire screen is captured like a digital photograph.
- Capturing a Specific Window: Want to grab just a particular window instead of the whole shebang? No problem! Click on the window you want to capture to make it active (meaning it’s the window in the foreground). Then, press the “Alt” key and hold it down while also pressing the “PrtSc” key. Now you’ve got a screenshot of just that specific window.
But wait, there’s more! You might be wondering where your captured screenshot goes. Don’t worry, it’s not lost in the digital void. However, Windows 10 doesn’t automatically display the screenshot on your screen. Here’s how to access your captured image:
- Open an Image Editing Program: Fire up your favorite image editing software, like the classic Paint program that comes pre-installed with Windows. Alternatively, you can use more advanced programs like Photoshop.
- Paste Your Screenshot: Once your chosen image editing program is open, press the “Ctrl” key and then tap the “V” key on your keyboard. This magic keyboard combination, known as “paste,” will take the screenshot you captured earlier and place it into your editing program.
- Save Your Work (Optional): Now you can edit your screenshot if needed. Perhaps you want to crop it, add some text, or adjust the brightness. Once you’re happy with your masterpiece, click “Save As” within your image editing program to save the screenshot to your desired location on your computer.
Method 2: Snipping Tool – The Tailored Screenshot Taker
Sometimes, you might not need to capture your entire screen. Maybe you just want a specific portion, like a particular section of a webpage or a dialogue box. This is where the Snipping Tool comes in – your personal screenshot tailor!
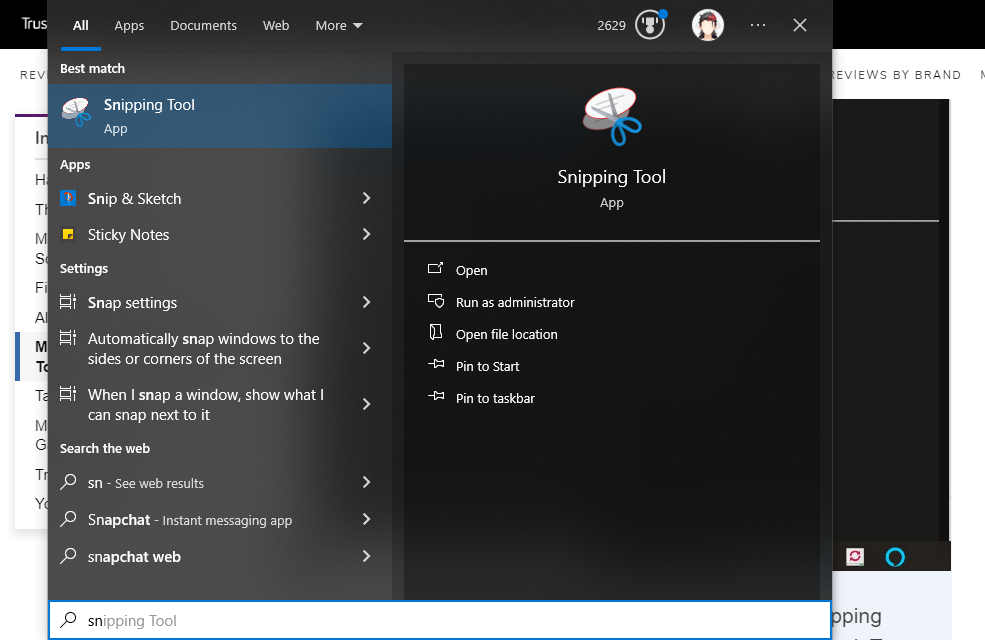
- Search for the Snipping Tool: Head over to the search bar located in the bottom left corner of your screen. Click on it and start typing “Snipping Tool.” As you type, Windows will start suggesting programs that match your search.
- Launch the Snipping Tool: Once you see “Snipping Tool” pop up in the search results, click on it to launch the program.
- Choose Your Snipping Mode: The Snipping Tool offers different ways to capture your screen. Here’s a quick breakdown:
- Rectangular Snip: This is the most common mode, allowing you to capture a specific rectangular area of your screen.
- Freehand Snip: Feeling creative? This mode lets you draw a freehand shape around the area you want to capture, perfect for grabbing oddly shaped elements.
- Window Snip: This mode simplifies things by automatically capturing the entire window that’s currently active on your screen.
- Full-screen Snip: This one works similarly to the Print Screen key, capturing your entire screen in one go.
- Capture Your Desired Area: Once you’ve chosen your snipping mode, click “New” in the Snipping Tool window. Your screen will dim slightly, and you can then use your mouse to drag and create a selection around the area you want to capture.
- Save Your Screenshot: After capturing your chosen area, you’ll see a small preview window pop up. This allows you to review the screenshot and make any necessary adjustments. If you’re happy with it, click on the “Save As” button and choose a location on your computer to save your screenshot.
Method 3: Windows Key + Print Screen – The Quick and Easy Screenshot
Feeling the need for speed? This method is the quickest way to capture your entire screen and automatically save it without any additional steps. Here’s how it works:
- The Shortcut Combination: Press the Windows key on your keyboard (usually located between the “Ctrl” and “Alt” keys) and hold it down. While holding the Windows key, press the “Print Screen” key (remember, it might be labeled “PrtSc” or “PrtScn“). You should see the screen dim for a brief moment, indicating the screenshot has been captured.
- Finding Your Screenshot: Unlike using the Print Screen key alone, this method automatically saves your screenshot without needing to paste it into an image editor. So, where does it go? The captured screenshot is conveniently saved in a folder called “Screenshots” within your “Pictures” folder. You can access this folder by opening File Explorer (the yellow folder icon in your taskbar) and navigating to Pictures > Screenshots. There you’ll find all your screenshots captured using this method, neatly organized and readily available for editing or sharing.
Choosing the Right Method: A Screenshot for Every Need
Now you’re equipped with three fantastic methods for capturing screenshots on Windows 10. The best method for you depends on your specific needs:
- Need speed? The Windows Key + Print Screen combo is the fastest way to grab your entire screen and save it automatically.
- Want to capture a specific area? The Snipping Tool offers various snipping modes for tailored screenshots.
- Need the whole picture (literally)? The classic Print Screen key is perfect for capturing your entire screen in a single shot.
If you’re looking to buy new MacBook Pro Latest Model 15.4 “, i7 / 16G-1TB Retina Display Laptop for office or personal use with discount then buy from here our affiliated link below.

Bonus Tip: Editing and Sharing Your Screenshots
No matter which method you use, all your screenshots are saved as image files. This means you can edit them using any image editing software you have, like Paint or Photoshop. You can crop unwanted parts, add text annotations, or adjust brightness and contrast. Once you’ve edited your screenshot to perfection, you can easily share it with friends, family, or colleagues via email, social media, or messaging apps.
Mastering the Art of Screenshots
With these methods and tips at your fingertips, you’re now a screenshot ninja! Capturing what’s happening on your screen has never been easier. So, go forth and screenshot with confidence, knowing you have the right tool for the job at your disposal. Remember, practice makes perfect, so experiment with each method to discover which one becomes your go-to technique for capturing those valuable on-screen moments.
Advanced Techniques and Troubleshooting:
- Capturing Scrolling Windows: The Snipping Tool might not be ideal for capturing long webpages or documents that require scrolling. Here’s a workaround:
- Open the webpage or document you want to capture.
- Use the keyboard shortcut “Windows Key + Shift + S” to activate the Snipping Tool in “Snip & Sketch” mode.
- Your screen will dim, and you’ll see a selection rectangle appear.
- Click and hold the left mouse button, then drag down to encompass the entire scrolling content. Release the mouse button to capture the entire window.
- This captured image will be saved to your clipboard, allowing you to paste it into an image editing program like Paint and save it as a single image.
- Capturing Multiple Screenshots: While the methods above capture a single screenshot at a time, there might be situations where you need to capture multiple sequential screenshots to document a process or workflow. Here are two options:
- Third-Party Screenshot Tools: Several free and paid third-party screenshot tools offer features like automatic scrolling capture and the ability to take multiple screenshots at set intervals. Explore options like Screenshot or Snagit to find a tool that suits your needs.
- Problem Steps Recorder (PSR): Built-in to Windows 10, the Problem Steps Recorder (PSR) allows you to capture both screenshots and screen recordings. This can be helpful for creating tutorials or documenting technical issues. To use PSR, search for it in the Start Menu and follow the on-screen prompts to capture your screenshots or recordings.
- Troubleshooting Screenshot Issues:
- Missing Screenshots: If you’ve used the Print Screen key and can’t find your screenshot, it might not have been captured. Ensure you haven’t accidentally disabled clipboard history in Windows settings.
- Incorrect Save Location: Double-check the “Screenshots” folder location within your Pictures folder. You might have inadvertently changed the default save location in the past.
Taking Screenshots on Different Devices:
While this guide focuses on Windows 10, readers might be interested in learning how to capture screenshots on other devices they use:
- Mac Screenshots: Briefly explain using the “Command + Shift + 3” shortcut for capturing the entire screen and “Command + Shift + 4” for capturing a specific area on Mac computers.
- Android and iOS Screenshots: Mention the power button and volume down button combination for Android devices and the power button and home button combination (or swiping down from the top corner on newer models) for iPhones and iPads.
The Benefits of Screenshots:
- Improve Communication: Sharing screenshots can be a more efficient way to explain something than relying on written instructions alone. Visuals can be easier to understand and can save time compared to lengthy descriptions.
- Document Information: Screenshots can be used to capture important information displayed on your screen, such as error messages, website content, or program settings. This can be helpful for troubleshooting problems, creating reference guides, or keeping track of specific information.
- Create Tutorials: Screenshots can be used alongside text or video to create step-by-step tutorials for various tasks. This can be helpful for training others or for self-reference when learning a new program.
- Capture Funny Moments: Sometimes, something funny or interesting happens on your screen that you want to share with others. Screenshots are a great way to capture these fleeting moments and share them with friends and family.
Conclusion:
By mastering the art of screenshotting on Windows 10, you unlock a valuable tool for communication, documentation, and sharing information. Whether you need to capture your entire screen, a specific window, or scrolling content, you now have the knowledge and techniques to do so efficiently. Remember, practice makes perfect, so experiment with the different methods and explore advanced techniques to discover what works best for your needs. With a little creativity and these helpful tips, you’ll be a screenshot pro in no time!
You can aslo read about How to screenshot Mac laptop and on Iphones.