
Table of Contents
Ways To Take Screenshots in Windows with Print Screen Key
Print Screen key still works but there other ways to take screenshots in windows 11
Using the Print Screen Key ways to take screenshots in windows 11 and captured screenshot still works in Windows 11, But there are easier and convenient ways to take screenshots in windows.
1. Use Snipping ways to take screenshots in windows
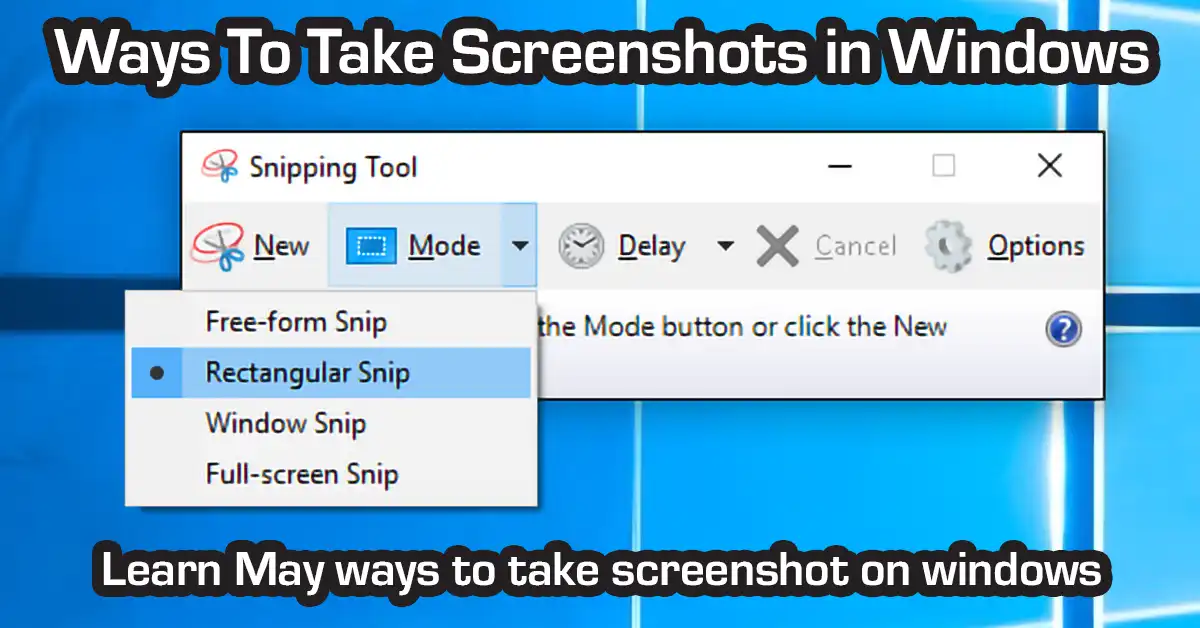
While Windows 11 might not have Siri at its command, it boasts a powerful built-in tool specifically designed for capturing screenshots. Here’s how to use it with ease, no button mashing required:
When you capture a snip, it’s automatically copied to the Snipping Tool window where you make changes, save, and share.
Open Snipping Tool
There are three ways to open Snipping Tool:
- Select the Start button, enter snipping tool, then select Snipping Tool from the results.
- Press Windows logo key + Shift + S.
- Press Print Screen (PrtSc).
Work with your screenshots
With Snipping Tool open, select one of the following to create and work with your screenshots.
- Open the Snipping Tool: Press the “Print Screen” key on your keyboard. On some laptops, you might need to press “Fn” + “Print Screen” together.
- Capture Modes: The Snipping Tool offers various capture modes to suit your needs:
- Full Screen: Capture your entire glorious desktop with a single click. (Bonus: No clicking required with keyboard shortcuts!)
- Window: Click on the specific window you want to capture to make it active, then click on the Snipping Tool to grab just that window.
- Area: Feeling selective? Click on “Selection” and drag your mouse to create a precise rectangle around the area you want to capture. Hit Enter to confirm.
How To Screenshot MacBook Laptop
How To Take Screenshot in Ubuntu
2. Ways To Take Screenshots in Windows with Keyboard Shortcuts: Classic and Efficient
For those who prefer the tried-and-true method of keyboard shortcuts, Windows 11 has you covered:
- Full Screenshot: Press “Print Screen” to capture your entire screen.
- Tip: This is the quickest way to grab everything on your desktop.
- Window Screenshot: Use the “Alt” + “Print Screen” shortcut to capture the currently active window.
- Ideal for: Capturing specific program interfaces or error messages.
- Area Screenshot: Press “Shift” + “Print Screen” and then drag your mouse to select the desired area. Hit Enter to capture.
- Perfect for: Grabbing specific elements or portions of your screen.
3. Keeping it Accessible: Snip & Sketch with a Touch
Windows 11 prioritizes accessibility, and Snip & Sketch offers a touch-friendly experience for capturing screenshots. Here’s how to activate it:
- Search for Snip & Sketch: Open the Start menu and type “Snip & Sketch” in the search bar. Launch the app.
- Capture Options: Snip & Sketch offers similar capture modes as the Snipping Tool: Fullscreen, Window, and Rectangular Snip. Simply click on the desired mode and capture your screen with a touch or your mouse.
Remember: No matter which method you choose, all screenshots are automatically saved in the “Pictures” folder > “Screenshots” subfolder on your Windows 11 system.
Bonus Tip: Feeling creative? Edit your screenshots using image editing software like Paint or GIMP to personalize them with annotations, cropping, or other adjustments.
Now You’re a Screenshot Pro!
With these methods at your disposal, capturing anything on your Windows 11 screen is a piece of cake, whether you prefer voice commands (well, keyboard shortcuts!), the classic Snipping Tool, or the touch-friendly Snip & Sketch. So go forth and capture with confidence!
If you need a cheap MacBook Pro then go HERE!